Inside Modern Snowmobile Drive Belts
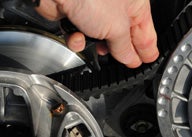
Today's drive belts cost more but last longer and are more reliable than ever
Arguably the most important piece in your snowmobile’s drive system, the drive belt links your engine’s power to your sled’s track. The performance of your sled is linked to that narrow rubberized band that makes up the most critical piece in your snowmobile’s drive system. For your sled to operate at 100 percent the drive belt must be the correct width, length and compound. Knowing what makes belts tick can help you keep your sled operating at optimum levels.
Why Belts Cost So Much
Just 10 short years ago you could buy a snowmobile drive belt for your ZR or XC for about $40. Now you can expect to pay about three times that for your ProCross or Rush. Why? One reason is sleds have more horsepower and another is technology.
Belt technology has improved so much that manufacturers can now make a better belt using more exotic materials such as Kevlar, a Dupont product. While belts have become more reliable and durable, the techniques to make them last longer are constantly being updated, as belts need to work reliably in an ever changing and hostile environment of heat, torque and RPM.
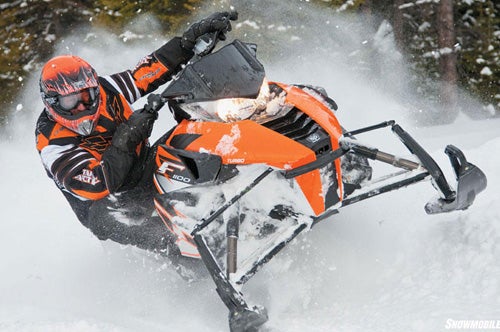 Modern snowmobile drive belts are more expensive because they have to be built to withstand the rigors of a modern high-performance snowmobile.
When drive belts were primarily cords and rubber, back in the so-called “golden days” of the sport, riders wouldn’t think of going off without at least a spare — or two or three. If you see photos of cross country racers from the late 1960s or 1970s, you’ll note that many riders criss-crossed spare belts around their torso like a bandolero wearing ammo belts. They had to as those early drive belts ripped apart under the torque of the high-powered 50 horsepower engines! That began to change with the introduction of aramid fibers, which combined the flexibility of rubber with the strength of steel. With brand names like “Fiber B,” drive belts showcased new developments in belt design. Today, the fibers used in drive belt construction, like Kevlar, are better than ever and allow drive belt engineers to develop new techniques to improve belt efficiency.
Belt design means more than stronger, longer lasting cords, it means that products like Kevlar can be used to keep a belt from “crowning,” or getting squeezed so much by the clutches that the belt starts to deform and become narrower. But Kevlar and other more expensive manufacturing techniques cost more money and the processes to incorporate into the belt are more expensive, which drives the cost of the belt higher.
Construction Elements
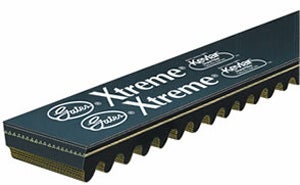 Gates uses advanced composite technology in its Xtreme drive belt to maximize durability and functional performance over the life of the belt. (Photo courtesy of Gates)
One of today’s more popular long lasting drive belts is the Gates Xtreme. To achieve durability, Gates designed the belt with proprietary construction features exclusive to the undercord and the notch fabric.
The undercord of any drive belt must withstand extreme fluctuating forces imposed by a snowmobile’s clutch system. Heat buildup can be a problem as a belt flexes around the drive and driven pulleys. In addition the belt material needs to minimize energy loss, be wear and crack resistant and maintain appropriate friction against the pulley walls. Keep in mind that under aggressive riding action where the drive is reacting to maximum power and torque, those unseen, hard-working, under hood belt components can generate belt temperatures that exceed 230°F.
That why Gates uses a polycholorprene/aramid fiber composite in its undercord construction to resist degradation under extreme operating conditions. The drive belt manufacturer claims that snowmobilers gain rugged dependability, especially under high horsepower loads.
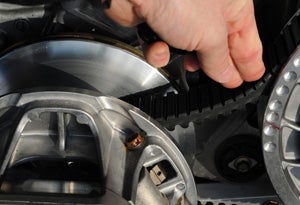 Checking belt deflection is an easy way to tell if your belt is too long or too short.
Gates also specifies a special notch fabric to reinforce its belt’s notch structure, prevent cracking, and minimize “greasing” of belt material deposits that can cause pulley lock up. Today’s modern drive belt must resist fatigue but also allow controlled stretch while operating in an ambient temperature environment of -35° Celsius to +110° C. The use of Kevlar reinforcement offers up to 25 percent longer belt life thanks to its ability to withstand flexing and the constant cycling of a snowmobile’s drive system.
You may note that even belts for lower-horsepower sleds are getting more expensive. That’s because improvements are constantly being made to the way the cords are adhered in the belt.
Drive belts like the Gates Trail Runner are intended for recreational riding on sleds up to 500cc displacement. Higher performance drive belts like the Gates Xtreme were developed for the moderate to aggressive rider on high-performance sleds.
Regardless of your riding intention, just be a bit sympathetic to the rigors a drive belt faces. A snowmobile drive belt at maximum rpm rotates around the drive more than 4500 times per minute. It will enter and exit both the drive and driven pulleys twice per revolution, meaning it slides in and out of the pulleys more than 18,000 times per minute while being squeezed with 2,000 pounds of force.
Belt Maintenance
There are many good snowmobile drive belts on the market and you need to select the best belt based on what you expect in price, quality and performance. The good news is, protecting your belt investment is relatively simple and takes just three easy steps:
1. Clean Everything!
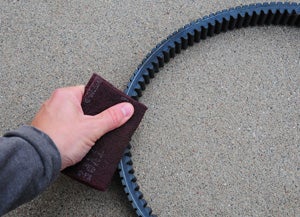 Scuffing your belt with a red Scotch Brite pad will remove any glaze that has built up.
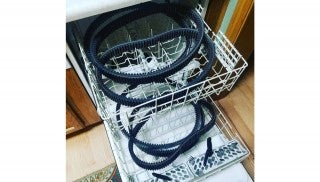
The belt is simple to remove from the sled. If you don’t know how to remove the belt on your sled, check the manual or search online for your model. Once the belt is removed clean the clutch sheaves with a red 3M Scotch Brite scuff pad and wipe them clean with acetone. Take the same red scuff pad and rub the sides of the belts to remove any glaze. Inspect the belt for frayed cords, uneven “hourglass” shapes or other defects. If you’re installing a new belt wash it in your sink with hot soapy water to remove any mold release left over from manufacturing. (Mold release compound is the stuff that gives the new belt a slightly slimy feel.) Now we have a clean belt, a clean secondary and a clean primary clutch.
2. Check Deflection
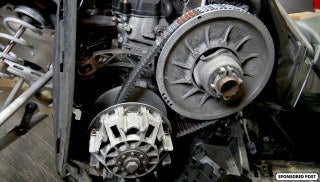
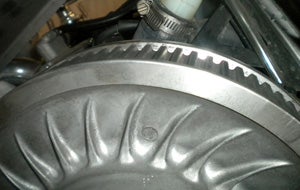 This belt is sitting too low in the secondary. A good rule of thumb is to have the outer cogs of the belt sticking up above the sheaves. This sled either has a stretched belt or the secondary clutch needs to have some spacers removed to narrow it up.
Install the belt (dry it first if you washed it), run the sled on a stand or take it for a short ride, then observe where the belt is sitting in the clutches. There should be 1/16-1/8-inch of belt sticking up above the secondary sheaves. If not, your belt may be too short, too long or your clutches themselves may be out of alignment. Most likely it’s your belt, but on some sleds you may have the option of adding/removing shims to adjust belt deflection in the secondary.
Next, lay a straight edge on the belt so it spans the distance between the clutches. At the mid-point between the clutches, push down on the belt to take up the slack and measure the distance between the straight edge and the belt. This is the deflection. Each brand has a different spec for this measurement, but most are between 1 1/8-1 ¼-inch. If your belt is sitting correctly in the secondary and the deflection is within spec you are good to go.
3. Break In The Belt
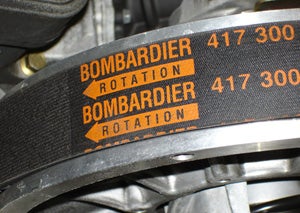 Always make sure you install a belt so it spins in the same direction in which it was broken in. Some even have arrows like this Ski-Doo belt.
A new belt should be broken in. An easy 20-30-mile ride is sufficient for break-in. Ride normally but avoid any long lake pulls or really aggressive riding during break-in. That belt’s too expensive to abuse! What you are doing is basically “seating” the belt and getting it used to the clutch sheave angles. If you put on a new belt you may notice a performance increase if your old belt was worn out. This is probably because the dimensions of the old belt had changed enough so it had fallen out of spec and essentially wasn’t the “correct” belt anymore. Keep it as a spare. Take note, your sled will feel like new again with a fresh belt!
Related Reading How to Install an Aftermarket Track Track Studding the Right Way How to Install Custom Handlebars




 Your Privacy Choices